Last September I decided that the gear gaiters needed some 'refreshment'. Looking on E-bay, I quickly sourced a readily available Genuine Italian Full-Grain Leather three piece set for only £14 and read up about what to do...

Here is the original factory fitted gaiters looking a bit weary after nearly 13 years of service! I guess I never really noticed their condition till all the recent work on the interior focused my attention on them.

Genuinely happy with the 'Genuine Italian Full Grain leather' three piece. Always a bit weary of product descriptions, and I have no idea what is 'Italian' about them, but they do smell gorgeous, are thick and well put together. I already feel closer to a dappled Tuscan country lane or that bucket-list Amalfi coastal drive.. ahh, the power of advertising!!
But, back in the real world..
Feel like I should name check the company, but I can't recall them off hand. They were UK based and speciallised in vehicle trimming. It wasn't one of the LR aftermarket suppliers and certainly not any dealer. They do sell them but the cost is prohibitive...
The above photo shows the new gaiter in front of the old mounted one. The difference in quality is readily apparent.
I have never tackled any kind of 'trimming' job on a vehicle before. (Apart from spraying glue on loose bits of the headlining ). Upholstery seems like a black art to me, yet this job is easy to accomplish for a novice....
Both of the gear gaiters are removed by firstly releasing their plastic retaining plates from the central console and then simply unscrewing the gear-knob from its stalk. Releasing the base plate first, ensures that the gaiter can freely revolve with the gear-knob as it is unscrewed.

Here is the main gearbox gaiter showing the six retaining lugs on its base that need to be disengaged from the central console. The base of the gaiter material is simply wrapped around the base plate and glued in place. This material needs to be removed and the base plate cleaned of any residue.
I was surprised just how heavy the actual gear knob is.

It can easily be seen just how threadbare the factory material has become in the above photo. There are holes and tears along the crease lines. This 'material' is much thinner then the 'Genuine Italian Full-Grain Leathe ' replacements and I even wondered if it was leather at all? I mean, does leather have a woven base??

With the old gaiter discarded and the mounting plate cleaned of any residue, the installation of the new gaiter can begin.
Instructions are to use fabric glue to stick the new gaiter to the mounting plate. I mixed up some Bostok Evo-Stick two- part resin. Immediately I thought this was a bit of an overkill and I was weary of getting sticky fingers and splodges all over that pretty Genuine Italian leather! The resin proved to be very effective for this task!
The new gaiter was a snug fit on the frame and I decided not to stick it all down in one go and just to do the two opposite sides to help control the outcome a bit better.
Clothes pegs provided enough clamping force to hold the gaiter in position whilst the Evo-Stick set.
Putting the main gear gaiter aside to dry allowed me to work on the High/Low range gaiter..

This is the High/Low range gear gaiter with the knob removed. It shows the rubber retaining ring that secures the top of the gaiter to the gear lever.
Turning the gaiter inside out will reveal the rubber ring which is a tight fit into a machined groove on the gear lever. This is the same arrangement as on the other gaiter, but I also recall it being stuck down as well. The rubber 'O' rings were reused.
The new gaiter here was a much tighter fit onto the base plate, but the suppleness of the 'Genuine Italian Full-Grain Leather ' meant it could be easily stretched to fit.
Lurking in the background of this photo is... the one and only,... The Pretender to the Crown , The New Kid on The Block, The Hardest Wearing Gaiter in Gaiterdom, the Number One Gear Brother.. The Godfather of Gear.. The Genuine Italian Full-Grain Leather Gaiter... (phew!..got there. .)
The visible triangular cutout on its base helps the leather conform to the rounded corner of its base. This is important to ensure that the mounted gaiter sits flush to the plate and doesn't foul the mounting lugs.

This photo shows the new high/low range gaiter pegged-out to dry. As before, I worked two sides at a time and used Evo-Stick sparingly....

The third gaiter supplied is for the Handbrake and it completes the set. Once again, the condition of the factory fit gaiter is questionable. ...

Here is the new gaiter sliding down the handbrake lever to take its place.
I ended up replacing this gaiter 'in situ'. I had planned to remove the handbrake lever but that is way too involved. Then I thought about removing the actual hand grip but that is bonded to the metal lever..
The answer was to disconnect the base of the gaiter and simply turn it inside out and up along the lever. There is a rubber O-ring retainer on the base of the hand grip which can be seen above as a bulge beneath the hand grip base.
The base of the gaiter is attached to the central console by a wire spring which also gives 'shape' to the base of the gaiter. It's a bit difficult to explain but once the rubber console mat and the switch panel cover were removed, it was easier to see its construction.
The new gaiter was fitted inside-out so that the first attachment was the rubber ring at the base of the hand-lever.
Attaching the wire frame was a bit fiddly. The end of the gaiter is shaped to be folded around the wire and glued back in on itself. Luckily, I remembered I had some fabric spray glue, the kind that is all 'spidery' when it comes out of the can. To avoid that messy travesty, I put a good squirt into a plastic tub and applied the glue to the gaiter with a small spatula. The area to work is quite small and confined so patience is required.
The end result was worth it. ..

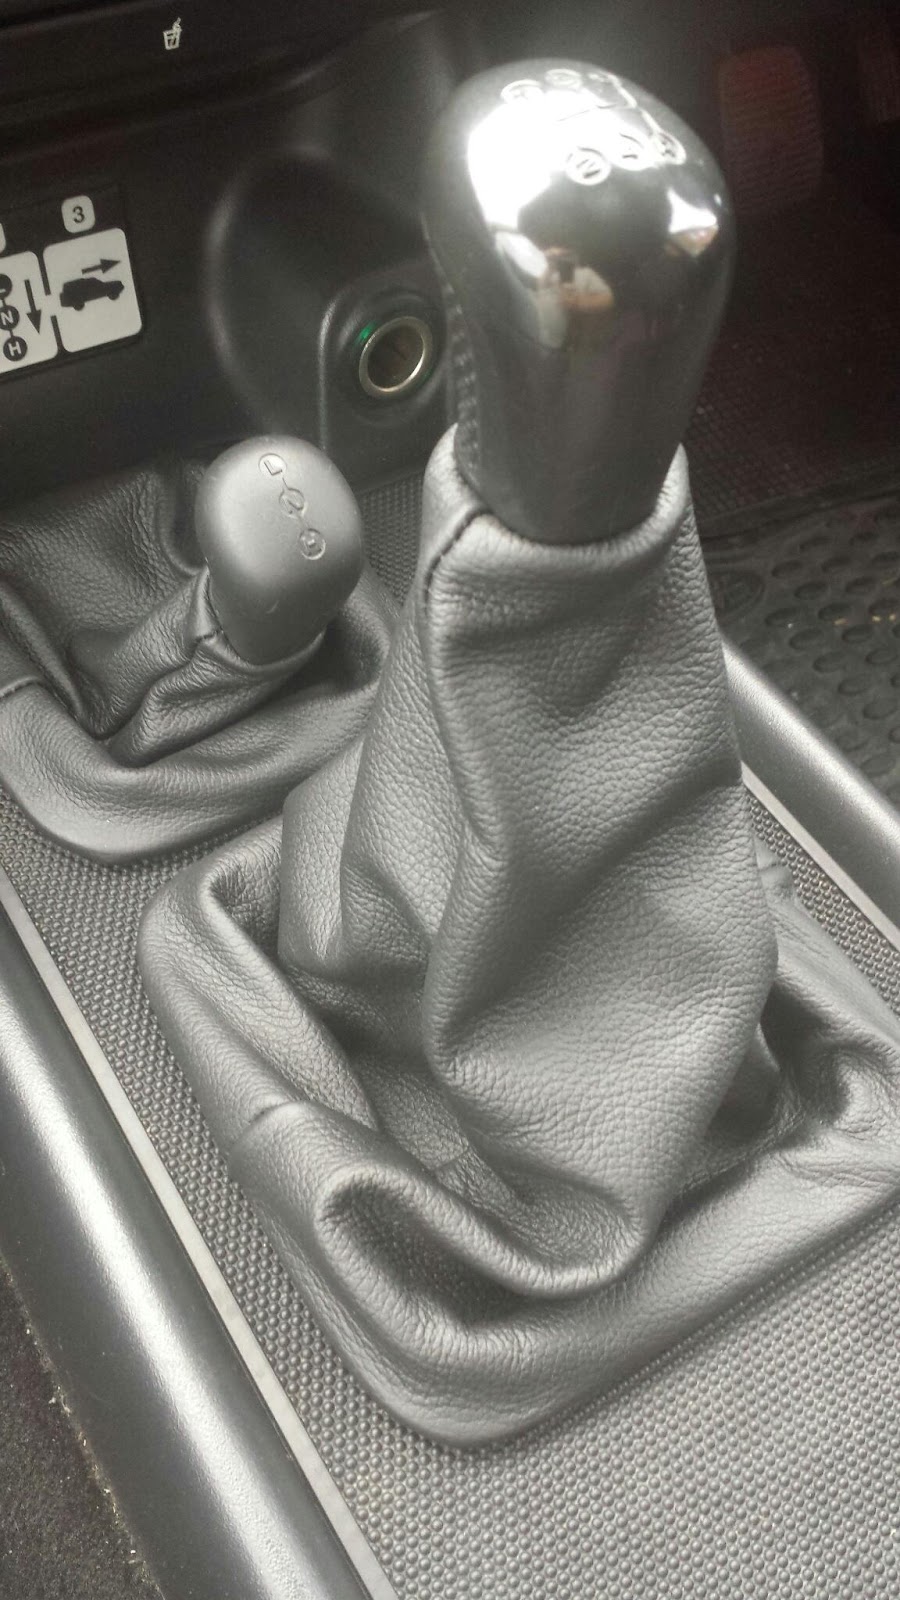
Two photos of the new gaiters all installed and smelling wonderful..!!
No comments:
Post a Comment
Note: only a member of this blog may post a comment.