Tuesday, 21 February 2017

Td5 D2 engine - Fuel Leak

Always on the lookout for the next maintenance issue to emerge whilst at the same time keeping an eye on any existing 'conditions'. 

The other day after a drive to the local superstore, there was a distinct smell of diesel fuel in the air when I got out. It could have been any of the cars around although I recall there not being that many parked in the immediate vicinity. I planned to have a closer look and investigate more after returning after the shopping. 

Needless to say it slipped my mind and with the shopping all stored away and no hint of diesel fumes, I happily continued the journey. 

On returning home after a little drive around I was greeted on exiting the door by the smell of Diesel again. This obviously meant the fumes where from Hx and that "pit of the stomach' feeling returned. 

Reverse parking Hx on the drive further revealed a trail of drips on the road surface marking out the manouvere kind of like a blood trail.

I quickly placed a finger into a fresh splash and it felt and smelt of Diesel. This was serious,  I have never seen so much obvious spillage before! Reluctant to get under and check things out I elected to wait till the morning and mulled the situation overnight.

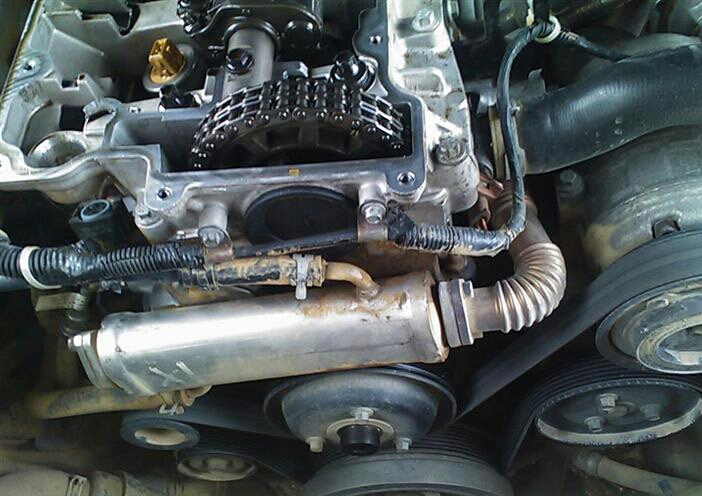
Initial fear was the FPR was leaking again. I had repaired this back in May 2013 and it was quite an undertaking to get at it...  I recalled fitting a 'leak off tube' onto the regulator casing (using some spare blue vac.tube) and routing this tube down below the chassis. My thinking  being that any future leaks would be easier to detect and help to keep the rest of the engine clean!

The next morning I went out to investigate the leak. There were no telltale puddles under Hx or under the bonnet. I removed the acoustic cover from the engine to get visual access to the regulator. It looked dry enough and I was able to get fingers down there and check all the hoses and connections which all appeared to be dry and with no residue of a diesel leak anywhere in the engine bay, things started to get a bit non predictable.

The fuel system on the Td5 has a working pressure of 4 bar which is the equivalent of 58 psi and more then enough to turn a pin-prick hole into a gushing fountain. I figured that any leak would have left a tell tale stain even after the diesel had slowly evaporated and looking for fresh stains should be a guide to the leaks location.

I decided to start the engine up and observe the fuel system with the engine running at full pressure. It started with its usual eagerness and I revved it up above the idle for a while. There was nothing obviously leaking under the bonnet and the 'drip-tube' was dry. I then switched off and scratched my head with a cup of tea.

When I looked out the window waiting for the kettle I immediately saw a big dark patch on the floor behind the rear offside tyre. It was like the water run-off puddle when the icy frost melts, but I knew today it was something else. 

Took this photo after I had mopped all the spilt diesel up! This was after running the engine for a minute or two. I did not see this spillage form as I was concentrating on the engine bay. (DOH) It would have been constructive to see if the spill occurred with the ignition on and the pump 'priming' and/or with the engine running or even when the engine stopped ..

Either way, it's clear the leak is from the area of the fuel filter..


Two views of the fitted fuel filter mounted on the chassis rail inside the rear wheel arch. 

This filter is overdue for replacement and I have a 'Mahle KC80' waiting to be fitted for over 12 months while I was supposed to be sorting the ongoing 'water sensor' issue.

The fitted position of the fuel filter on the Td5 Discovery has always seemed odd to me. Admittedly it is easily accessible for maintenance, but being exposed and close to the rear wheel and open to the elements and flying debris kicked up from the tyre could be an issue. Particularly with that water sensor and it's electrical plug hanging low on its base..

Even the Td5 Defender has a similar issue with its location, but it is fitted with a metal cover plate to protect the filter from the elements.

Here is the filter and cover installed on a Defender, more about this later....


FINDING THE SOURCE  OF THE LEAK

Whatever the cause of this leak is, Hx is going nowhere till its sorted.

Two more views showing the fitted filter. The top of the filter where all the pipes attach appears dry so I believe the leak is from the filter body or the water sensor/drain plug at the bottom. If the above photos are enlarged it is possible to see drips of diesel on the lowest surfaces and even on the end of the sensor drain tube.

The filter body is secure but the water sensor appeared to tighten up a bit. Only noticed this when I tried removing the sensor and found I was turning it the wrong way!

Historically, there is a well documented fault with the fuel filter supply pipes that can result in one of the pipes chaffing on other components and leaking. This fault was even the subject of a VOSA recall program that effected thousands of Discovery 2.  Hx is unfortunately one of them but I have no idea if the remedial work was ever done to Hx. It just involved re-routing the pipework to avoid any possibility of chaffing. It is possible that it is the cause of the leak but surely if so then there would be more direct evidence of the source of the leak? 

For now, all my money is on the drain plug/ water sensor at the base of the filter. There is a lot of documented problems with these units ranging from snapped wires, false alerts (Hx has those! ), cracked and leaky bodies..  So much hassle in fact that Land Rover even deleted them from the final production run. However, knowing the cost of these units the reason for deletion was more likely penny-pinching cost savings.

What I propose to do is to fit the new filter complete with the supplied standard white plastic drain plug and delete the fitted water sensor and drain that is currently fitted on Hx.

This is a photo of the Td5 Discovery water sensor/drain (WKW500070). It can be seen fitted to the base of the fuel filter in the above photos and also shows where the electrical cabling attaches. The tubular drain is also clearly visible here.


This is the water sensor and wiring loom from a Td5 Defender (WKW500060 ). Although the sensor body and mounting is the same, the electrical plug is different and they are not interchangeable. The Defender installation offers a better level of protection from the elements inside the wheel arch then the exposed Discovery install. 


This is the new fuel filter. It came fitted with the white plastic drain plug that is interchangeable with the 'water sensor' on the Td5. 

The Land Rover part number ESR4686 is for all Td5 engines and it is readily available from a number of aftermarket suppliers. I bought this filter back in June 2015 for £8.40 and only now am I getting around to fitting it!

I don't know who the OEM factory-fitted filter was made by. And I have to assume that the leaking filter has never been changed before. 

I sourced the new filter from a LR specialist garage that stated they used Mahle filters for all their workshop services.


Interesting to note that this Mahle filter is labelled 'Bearmach' on the box.


Two close ups of the manual drain plug on the base of the filter. The grey rubber washer provides the effective seal and it's recommended that it is lubricated with oil or diesel before fitting. The plastic thread on the drain plug can easily be damaged by excessive tightening so be careful when fitting.

If this drain plug fails in service then all the fuel will drain out and the engine will be starved of fuel. Thinking about it, this is a handy way to sabotage a Td5,  just reach inside the wheel arch and loosen that plug....

I intend to fabricate some kind of a plug to place into the bottom of the drain tube to combat the ingress of dirt given the exposed position of the fuel filter on the Discovery.


REMOVING, REPLACING , PURGING

Removing the old filter is straight forward. It simply screws off just like a standard oil filter. 

It's important to ensure the upper sealing rubber rings are retrieved as they often stay attached to the filter head. 

The new sealing rings should also be lubricated lightly. In service the filter body can get quite warm due to the heated fuel passing through returning from the engine. This may well be a reason for the filters location exposed to the airflow to allow for heat dissipation. The heat and pressure probably contributes in time to the bonding of the rubber sealing ring. 

Another tip is to drain the old filter first and use that fuel or better again, use fresh fuel to fill up the new filter before fitting it in order to help with the 'purging' process. 

I tried to drain the old filter while it was still mounted on Hx by using the water-sensor drain on its base.  At this point it appeared that the water-sensor body was a bit 'loose' and this may well have been the source of the leak. 

Frustratingly, no fuel ran out of the drain hole but instead it flowed out from the top of the sensor body as I loosened it off. I quickly tightened it up to stop the flow then removed the complete filter body and then removed the water sensor and drained the fuel into a suitable container. Quite a bit came out and there was the inevitable spills as well.. It is recommended to wear rubber gloves and old clothes and have some rags handy to mop the spills up.

Above is a generic graphic of the filtration flow through a cartridge type filter. The fuel to be filtered enters around the outer holes in the top panel and exits via the central hole. Any fuel poured into the new filter to prime it should really be poured into the outer ring of holes on the top panel of the filter. 

The Td5 fuel system operates at high pressure and any air in the system must be purged to achieve this. Changing the filter will inevitably introduce air to the system, but the 'purging' process once started is done automatically.

Once the new fuel filter is mounted it is time to start the purge process by turning the ignition key to P2. 

The dash board lights will be lit, but, and this is important... DO NOT ATTEMPT TO START THE ENGINE AT THIS STAGE.

The 'engine management' warning light may well stay illuminated indicating the system has detected a fault (ie..air/low pressure ) in the fuel line. 

Rave and personal experience indicates that at this point the purging starts automatically and will continue for 3 minutes. It is normal for the fuel pump to run for three minutes when the ignition is at P2.

The fuel pump will be heard to surge fuel around the system to remove the air. There is a purge valve built into the filter head and the fuel pump itself. 

Bear in mind that if the new filter is empty, it will need to be filled by the pump and that will prolong the purge process. Three minutes is the 'time-out' period for the fuel pump operation governed by the engine Ecu. If a hand is placed on the fuel lines the pulsing action of the pump can be easily felt, but more noticeably the gurgling and rumbling from the pump in the fuel tank will easily be heard. It may be necessary to repeat the process a number of times to ensure that the air is fully purged from the fuel lines. 

This is a good reason to fill the new filter up with fuel before mounting it. The downside of repeated 'purging' is it can easily drain a weak battery leaving the engine difficult to start. 

Once the purging process is complete, the engine should start immediately or after very little cranking. This is assuming the battery is fully charged and there are no fuel leaks. If the engine fails to start then repeat the purge process.

I followed this sequence when replacing the new filter having filled it with some clean fuel. (pouring the fuel into the outside holes and avoiding the central hole.)

After switching the ignition on, I quickly listened for any noises from the pump area and could hear the surging and a good deal of 'gargling'. This quickly settled down after about 20 seconds and the noise from the pump was imperceptible. I was careful to let the process run for 3 minutes. I then switched the ignition off and checked for any leaking fuel of which there was none. At this point I could have tried starting the engine but I choose to repeat the process again giving another three minutes of purging.

I then attempted to start the engine and it happily fired first turn and ran as smooth as usual.

There is another method of 'purging' slightly differrent to the above 'Rave' procedure.

Basically when at P2 on the ignition, quickly fully depress the throttle pedal 4 or 5 times and the engine mgmt lamp on the dashboard will start to flash. The engine ECU is now in a kind of 'auto-purge' mode and will run the pump for 30 seconds then stop for a few seconds then start the pump again and so on until it declares itself 'purged' and the lamp extinguishes. The engine can now be started as normal.


MORE PHOTOS OF LEAKY FILTERS.


This image from the Web shows diesel leaking from one of the 4 Pipe connections on the top of the fuel filter mounting. The pipes have screw connectors and use copper washers which appear to have failed here. 

The same filter again showing the location of the install in the o/s rear wheel arch. To the right can be seen the rear suspension air-bag and the brake-lines for the nearby wheel. 

This image shows the exposed water sensor on the bottom of the fuel filter. All the dirt and built-up crud is a direct result of its exposed location inside the wheel arch.

This leak was cured by replacing the whole filter head (north of £80).


Same problem again, but this time...


..the intrepid poster (Handy Howie) used some PTFE tape on the effected pipe thread.


Job done !!  And a hefty saving on the cost of a new filter head.


AUTOPSY FOR THE HX FILTER.


This is the fuel filter removed from Hx. The metal label was facing the chassis member. There are no other identifying marks or Brand labels and overall, the surface area can only be said to be 'weathered'.

The base of the filter case has nut flats or 'castellations' formed onto it but they are hardly visible now.

I have owned Hx for 5 years now and never got around to changing the fuel filter till now. Throughout my ownership the dashboard 'water in fuel' light would occasionally briefly light up for just a second or so and then extinguish itself. I figured it to be an electrical glitch as the dashboard light should stay on pernemently till the issue is resolved by draining the water out from the bottom of the filter. 

I had tried to drain the system previously but was dismayed that no fluid at all came out of the drain hole..  Only now with the unit removed from Hx can I see why that was....


Two views above show the inside of the water sensor covered in crud and dirt. The drain hole tube (the bump in the outer ring) can be seen to be completely blocked.

That brass cross-headed screw is part of the electrical sensor and sits inside the filter base surrounded by Diesel fuel.


Three photos above show the now cleaned up water sensor with the cleared out drain tube.

The sealing washer shown below has been fitted in place above.


This is the base of the filter. The sealing rubber washer looks fine but everywhere else is weathered and just shows how dirt, dust and water can find its way into the sensor body as a result of the filters exposed location. 

I have not re-fitted the water sensor onto the new filter preferring to use the supplied white plastic drain. This means that any future water draining needs to be scheduled 'manually' as the warning light system is now disconnected.
  
I also intend to fabricate a plug for the water drain outlet. I secured the now redundant electrical lead and cabling using a cable-tie and stuffed a blob of blue-tack onto the connector terminals to hopefully weather-proof it. 

This is the top panel of the removed filter. The outer sealing ring was also in good condition, as was the central seal, but it is not shown here. The dark patches by the punched holes are all that remains of the dark slimy coating that covered the whole top panel.

Just how long was this filter in service. ?

I have a receipt for a service dated September 2009 indicating a fuel filter change with the mileage on 63094 which matches the MOT dated 8/9/09.  The mileage today is 96248 which gives 33154 miles since last change.

Wonder what the service interval is...?


PROTECTING THE FILTER BODY.


Two views above show the fuel filter installation on a Td5 Defender. It is mounted in the rear wheel arch forward of the wheel...

It consists of two pieces. The mounting plate WKT100010 is shown on the right above and attaches to the chassis via the filter-head mountings and the cover plate.  WKT100020 shown on the left encloses the filter and clips onto the mount-plate. 

These are not expensive items and are still available new...

It is possible to fit this protection (with a bit of modification) to the Td5 Discovery as the above photo shows...

Deleting the water sensor and using the standard white plug would further aid the fitting and the security of the fitment.


Friday, 20 January 2017

Td5 D2 electrics - Internal Courtesy lights

There are three factory-fitted interior lights. Each housing offers manual control over the light's operation, and the BCU is programmed to operate them all on demand and to fade them down on demand as well. There is also a glove box light that only works when the sidelights are on. Some models also have illuminated vanity mirrors on the sun-visors. All of the bulbs are the traditional 'festoon' type and can vary between 5 and 10 watt. If all the lamps are operating that can add up to a 40watt draw. 

Swapping out the Tungsten festoons for equivalent LED's is an easy upgrade. They are cheap, readily available and come in a range of styles and colours.

The main advantages of LED over Tungsten is reduced power consumption and extended lifespan. It is often claimed that LEDs use less then a tenth of the power to produce the same level of illumination. They also 'run' a lot cooler in terms of temperature.  


All the light fittings use a 36mm long Festoon bulb. They are available in a range of lengths and there are lots of different arrays of LEDs to select from.

I bought the above LED boards cheaply from the Internet. I choose to get both 'white' and 'red' LEDs and also bought 16 and 8 segment LED boards as an experiment. One of the 16 LED boards is shown above. 

Swapping them over is simple enough, but it must be noted that LED boards are polarity sensitive and may not work if connected the wrong way. It is easy to check this by simply swapping contacts in the light fitting. There may well be '+' or '-' marked on the reverse of the board as a guide. LEDs don't respond to a continuity test like a normal filament bulb would, so the only real way to test them is to supply them with current. 

Front Courtesy Light 

This is mounted on the overhead console above the driver, but the same fitting is also used in the rear cargo space.

Looking at the internal layout of the fitting, I got to thinking that there was a lot of room in there for an extra light fitting...


I made the extra terminal plates by cutting some spare metal strip to shape and fixing them to the existing terminals in the light fitting with some small nuts and bolts.

I quickly learnt that if I really wanted to cram more LEDs in there then the easier option was to buy bigger LED boards in the first place!


Rear Passenger Courtesy Light.

This is a physically smaller fitting and it uses a single latching button to manually over-ride the automatic function. The same size bulbs are used and the light fitting is mounted on the overhead panel between the small cargo nets.

Depending on the vehicle trim level, this panel also mounts the rear sunroof control whether it is manual or electric and also the rear air conditioning control. 

Hx originally had the manual-wind sunroof and when it was swapped over to electric, the 'electric' version of the panel as shown above was needed. The panel was sourced from a breakers yard and it arrived c/w the courtesy lamp attached. It was soon realised that the panel could be modified by opening out the blanked-off air-conditioner mounting and installing the 'spare' courtesy lamp in there. 

The additional lamp unit is fitted with a red LED board and it is wired independent of the BCU so that it will operate manually via the attached latching push-button.


Further Thoughts.

There is a lot of scope here for experimenting with different lighting effects that can appeal to individual taste. I know that changing over to the LEDs got me thinking about other options for internal lights...

Those thoughts would eventually lead to me installing some foot-well lights both front and back, some front door 'puddle' lamps and some rear passenger door 'marker' lamps. And as if that wasn't enough, some online research revealed LR installed a different front courtesy lamp unit into 'final-build' Discovery's.

Each of these options now has its own post...


Tuesday, 17 January 2017

Td5 D2 electrics - Tungsten to LED (3)

Decided to purchase a pair of what I call point-source  LED luminaires to use in the dipped headlight position on Hx.

I recently replaced the front sidelights on Hx with brighter LEDs and the result is an inbalance in the perceived tone of the light from the sidelight and the dipped Tungsten headlamps. 

Replacing the Tungsten headlight bulbs with these now readily available 'point source' LEDs will remedy that situation whilst retaining the correct beam projection and give the front an updated look.

Purchased from Ebay a pair of H7 fitting LED bulbs as shown below. They were listed as 'UK Stock' and arrived pretty sharpish. They cost £9.49 for the pair which is still cheaper then a pair of  'Osram Nightbreaker' tungsten bulbs. 

These bulbs incorporate a reflective 'trumpet'
design which helps to direct the light output from the two rings of LEDS into a concentrated 'point-source'  which pretty much mimics the traditional tungsten bulb filament. Therefore, they should produce the correct beam pattern when installed in the headlamp enclosure.


There are two rings of 8 LEDs that direct their light output directly onto the reflective surface of the 'trumpets'.

There is another four LEDs mounted on the end of the body beneath a lensed cover.  All together that makes a total of 20 LEDs in each light bulb 


I have already bench-tested these just to check that they work. I found their output to be blindingly bright, so I am a little concerned about their performance when fitted, but I guess all will be revealed soon...


COURTESY  LIGHT ISSUES 

A few months ago I replaced the internal courtesy festoon lamps with red LED festoon equivalents. I lived with this situation for many months but have gradually come to realise that the current front headlining lights do not adequately light the front seat area.  

Concurrent to this is the plan I have to install the courtesy light unit from a P38 onto the headlining. That plan has also kind of stalled for the moment. 

So the other day I swapped out one of the red LED festoons for an original Tungsten festoon bulb initially rated at 10w but soon swapped that out for a 5w festoon. 

In the cargo area the red LED festoon was swapped for a white LED festoon with much better results. I tend to switch that rear light manually when required and leave it in the 'off' position so that it does not auto-light if the back door is operated.


Saturday, 17 December 2016

Td5 D2 electrics - Tungsten to LED (2)

Back in August 2016, I replaced the single '501' LED bulbs that were put into the front sidelight positions on HX with multiple '501' LED bulbs. 

I wrote about this in the earlier post and since then it has become obvious that the multiple LED bulbs are far brighter then the single LED bulbs that they replaced. (It feels strange to refer to LED's as 'bulbs' but it seems the Pope still wears a big hat).

This has led to thoughts of upgrading the fitted H7 headlight bulbs from their stock Tungsten up to Halogen 'Nightbreaker ' bulbs.

A quick search online threw up some new information about the upcoming demise of Tungsten filament bulbs. The EU have already passed directives that will prohibit the manufacture and use of Tungsten bulbs based on their higher energy usage. This is/was scheduled for 2018 but may be put back due to industry pressure.

The continued development of LED technology is progressing with the latest developments using Graphene that promise potential leaps in brightness and compactness of LED fitments.
So while I was searching on E-bay for suitable Tungsten/Halogen headlight H7 upgrades ( ie Osram 'Nightbreaker') I was surprised to see a profusion of H7 LED bulbs that kind of mimicked the layout of a Tungsten element bulb..


Above is a diagram of a H7 Tungsten bulb. That measurement of 25mm from the base plate upto the filament is crucial for correct beam projection. The Tungsten filament is a 360 degree point source and the latest crop of LED replacements try to replicate this.....

These designs would appear to address the issue around 'point source' and the beam projection when installed in reflectors and lenses that were designed for H7 Tungsten bulbs....  They are certainly much more suitable then the H7 LED bulbs I bought earlier last year...

An 'old ' style LED H7, not a point source!! And most likely unable to produce the correct beam pattern in a headlamp unit.


A 'new' style H7 LED capable of better mimicking the point source of the Tungsten filament.


Two more designs that attempt to recreate a point source illumination. I particularly like the 'trumpet' design of the first one using the shaped 'trumpets' to produce the point source by concentrating the LED output..

I intend to purchase a pair of these 'trumpet' designs just to see....

All of the above H7 LED bulbs are direct replacements. As far as I can ascertain they all claim to have higher Lumen counts then Tungsten/Halogen but with less then a third of the power consumption.

A standard Tungsten headlamp bulb is rated at 55watt and produces 1000 Lumens. 

A Halogen ('Nightbreaker') can put out 1500 Lumens

All of the above LED bulbs are capable of matching the Lumen output for a third of the wattage, and would be ideal for use on HX, but there are available LED bulbs with much higher Lumen outputs...


Three images of super bright LED bulbs that probably can produce a better 'point source' then the other ones above.

They are all rated with higher wattage and Lumen output then the others, typically 30 watt plus and around 3000 Lumens. 

All that extra power means these units run at a  much higher temperature and because of that they need their own on-board cooling mechanism. This is contained in those 'plant-bulb' bases which house the heat sink or even a motorised fan. The physicality brings extra spatial requirements for their installing and also reflects in their price point.

I have seen this type of LED 'luminaire' asking around £50 to be taken home.....

Finally, the 'point source' revolution has even reached to the H11 fitment used on HX for its front fog lamps....
...saving those pennies as I write .....

Wednesday, 7 December 2016

Td5 D2 engine - EGR / Exhaust Cooler

A while ago I removed the EGR valve from HX. That was an easy and well documented modification helping the engine to breath more clean cooler air which all helps with the internal combustion.

Removing the EGR valve leaves a handful of 'open' vacuum lines that need to be plugged or removed entirely. The opening and closing of the valves is controlled by vacuum pressure which is supplied by the vacuum pump that is mounted on the front of the alternator.

Failure to block-off these vac lines can lead to failure of the brake-servo which also uses vacuum pressure from the pump. This is a safety critical concern and must be competently addressed.

HX is a '15P' Td5 with the additional fitted exhaust cooler mounted on the front of the engine directly in front of the cylinder head. In the following diagram, the exhaust cooler is labelled '3' and the fluted pipes either side connect it to the exhaust manifold on one side and the EGR valve (1) on the other. Part no.18 is the equivalent pipework on a non '15P' TD5

As well as having to seal the end of the cooler which has a direct feed from the hot exhaust manifold, the cooling function of the unit is provided by its built in water jacket connected by pipework to the engine cooling circuit. These coolant supply pipes need to be removed and the integrity of the cooling circuit must be maintained. Simply plugging their ends is not enough as that will only create 'dead' ends in the cooling circuit flow.


Two views of the exhaust cooler removed from a TD5 engine. The small bore connections for the water jacket can be easily seen and the last photo even shows the flimsy plastic pipework that I needed to replace. 

Sections of the factory fitted pipework used to service the exhaust cooler are made from a thin bore plastic that in time will just go brittle, crack and fail causing loss of the engine coolant and potentially cooking the engine.

I know this from experience as it was the first problem HX threw at me. I was tracing the source of a coolant leak and was shocked to find that the pipe was plastic and alarmed at how it just cracked under finger pressure!! I had to swap out a section of it with some rubber hose and even now it remains thus... 

It was always my intention to remove the exhaust cooler water pipes and that led me to an investigation of the routing of the cooling system pipes on the TD5 engine and to plan how to re-route the piping. Well that was a few years ago and the time has come to revisit that idea.

Rave is pretty good at describing the engine cooling system and even has diagrams of the differing systems and a very handy 'flow' diagram that displays the directional flow of water through the pipework.

Using these diagrams it is easy to see that the modification requires the exhaust cooler inlet and outlet to be connected together to effectively by-pass the exhaust cooler. The only question is where and how to do this .....


In the above diagram, the 'euro 3' 15P engine cooling system is shown while inset 'A' shows the original configuration. Part no.6 and 39 have the same function being the metal pipe that is attached to the rear of the engine block and fed by the oil cooler mounted below the turbo. Part 37 is a shaped rubber pipe running from the end of 6 direct to the inlet on the exhaust cooler 34. This pipe needs to be re-routed to connect to the coolant reservoir where 36 is shown to connect to the coolant reservoir.  This pipe, 36 is the thin brittle plastic one prone to failure.....

Figure it's best to use rubber hose for this but there is some tight bends to be made so raiding the spares box for suitably shaped lengths of hose is a must.... Not a hundred percent sure of the bore measurements, they look like they are different at each end but that is easily overcome with adaptors.

The above diagram from Rave shows the directional flow of coolant through all the pipework on both versions of the TD5. 

Apart from the obvious difference with the exhaust cooler install, careful study reveals differences in the radiator and coolant reservoir as regards the pipework attachment points. It is not possible to convert a 15P engine cooling system to the earlier cooling system without changing the radiator and coolant reservoir to match...  This should be born in mind if any spares are needed in the future..

Finally for now, a shot from the Web showing an exhaust cooler on the front of a TD5 engine. The fan has been removed along with the rocker cover and the injector harness. The black circular plug on the cylinder head immediately behind the exhaust cooler is the source of an oil leak on HX , but that's another story ..


Another blog deals with what happened when Hx started leaking coolant from the exhaust cooler return pipe and how I fabricated the by-pass hose discussed above...


Thursday, 1 December 2016

Td5 D2 Seats - Heating Elements

FRONT SEAT HEATING ELEMENTS. 


Pictured above is the heating element for a front seat 'squab' which is the upright back of the seat. Each front seat has two heating elements, one on the squab and another on the cushion. The white connector shown above simply plugs into the lead from the cushion element which itself then plugs into the fitted vehicle loom via the brown connector under the seat frame shown below.


All Discovery models have this brown connector under each front seat. It is wired into the vehicle loom and is used to supply power to the seat heating elements and the electric seat motors (if fitted).

Hx currently has black, fabric-covered, non-heated 
manual seats. It's electrical loom contains the wiring and connectors to enable the manual heated seat option to be easily installed.

Originally I was just going to install the 'manual' heated seat option and bought the above 'manual' element off E-bay. The plan has now changed to install fully electric seats and the above 'manual' element will no longer be suitable....

Although the heating pads for both the 'manual' and 'electric' seats are physically similar they do differ in their resistance and heating cycles and as a result of this they have differing part numbers ..

HGT500020   -  Seat cushion - Electric seat 
HGT500030   -  Seat squab - Electric seat

HGT500040   -  Seat cushion - Manual seat 
HGT500050   -  Seat squab - Manual seat   


These numbers are printed onto the element's fabric covering along with the word 'manual' or 'electric' to avoid confusion. It is important not to mix the heat pads together as that will lead to electrical inefficiencies and the potential of fire and burns!

Land Rover even issued a 'Technical Bulletin No 0130' back in 2004 that addressed this issue and the problem of local 'hot spots' on the seat cushion. ..


THE HEATING CYCLE. 

The operating temperatures are set by the factory and are not variable by the user. I believe that the lower target is 26°C and the upper target is 36°C.

Heated seat elements on an 'electric' seat are governed by a variable resistor/thermostat that automatically maintains or 'modulates' the heating output by varying the current draw as required in order to keep the operating temperature at the defined target.

The 'manual' heated seat is controlled by a simple thermostat that cuts power when the factory set 'max' temp value has been attained. When the lower 'min' temp is reached, the thermostat switches the power back on and the cycle repeats. 

I have read about the current draw being 150 watt which is a lot! The 'Owners Handbook' states that the heated seat option should only be used when the engine is running as the current is then supplied by the alternator. I don't know if that 150 watt figure is for both seats or just one. It also points to the need for the alternator charging circuits and the battery to be in a good healthy condition. I am now wondering what the rated output is for the fitted alternator?


CONSTRUCTION AND FITTING. 

Here are some close ups of the heating element sandwiched between the fabric layers. I photographed them back lit on a window to reveal their structure  


Any malfunction of the heating pads is nearly always due to breaks or creases in the thin wire element or in the connecting lead between the two elements on the seat. The wire is very thin and subject to a lifetime of flexing and compressing particularly on the drivers seat cushion.

There are many online accounts of repairs being undertaken to broken heating element wires by simply soldering and insulating the breakage. Most of the repairs can be done on the vehicle, but removing the seat is the preferred option as it allows greater access to remove the covers and foam pads.

The photo below shows the fitted position of an element on a squab cushion. It is attached to the foam cushion and lies beneath the outer covering. The method of fixing is just fabric glue, one side of the element is 'sticky-backed'. 

The connecting wire can be seen to be routed behind the base of the 'squab' foam. The seat 'cushion' is not shown. The cut-out sections on the element and the visible holes on the foam panel are to locate the 'hog-rings' that secure the covering to the cushion and the cushion to the seat frame.


Update  -  I keep meaning to uploadand insert the LR technical info sheets regarding faulty seat heat pads..  one day I will get around to figuring how to..!

Saturday, 5 November 2016

Happy MOT day!

Anticipation has been growing over the past few weeks what with the approaching yearly MOT test and the prospect of a bunch of strangers getting intimate with my squeeze!

I try to keep on top of the maintenance issues and even if nothing is done at least I can say that I knew it needed doing. 
  
My biggest fear is the unknown or slowly developing problem that goes unnoticed at first.  I guess that's a good reason to have someone unattached and independent to examine her for any safety issues.

Age is surely creeping up on her (and everybody else). Hx was first registered 11/09/02 which now sees her into the 15th year. Corrosion in old D2s is not as prevalent as in D1s. My last Discovery (300tdi) succumbed to the tin worm quite famously so once bitten. ....   

As far as I have learned, the danger spots on the D2 are the Rear Chassis rails and outriggers. Last year I treated these areas on Hx to a good scrape down of all the now flaky factory coating and an application of 'Killrust' followed by a spray of Matt black paint which looked mighty fine for a few months then the surface rust began returning. I guess once established it just never goes away.

The only other corrosion issue was on the rear offside inner wheel arch. Thankfully this is not structural so a patched repair was adequate, but it was all the same, psychologically damaging!

So to prepare Hx for the test I checked all the external lights, the wipers, washers, horn, seat belts, and doorlocks. Also inside, I cleaned the windscreen and removed the dangler from the mirror. 

Outside I checked the tyres and pressures and noticed the front o/s was wearing down (evenly) as was the rear o/s. The rear o/s has the historic slow puncture that was present from the start of ownership.  A year or so ago I discovered a cut on the inside wall of that tyre that wasn't noticed on the last year's test and indeed wasn't seen on this year's test either.  Now its my belief that any cut or tear on the sidewall would be a safety issue and a sure MOT fail.....?

Under the bonnet, I checked all fluid levels which were correct and no new leaks. I took out the air filter gave it a good brush and a vac and replaced.  I also removed and cleaned the intake sensor. The 'pitot' hole was clear, but the body was coated in an oily deposit which is surely the condition of the intake manifold and sourced from the engine breather. ..  I did this with an eye on the emission / smoke test  thinking the more air the engine burns the less smoke will be generated. 

Final prep was to get underneath and wipe the transfer box and the cross member of the oily deposits and then a short drive to warm the engine up before surrendering to the test.

For the past 3 years I have taken Hx to the same testing station. I would happily recommend this place. Easy in and easy out, same day service and half the price I've paid elsewhere. An hours wait watching the comings and goings in the office and Hx being shoved around the workshop!

It passed again. Two 'advisories' given. One for the rear o/s tyre worn close to limit and the other for the 'seepage from component ' but in reality it's the oil leaking from the front camshaft cover on the cylinder head, again an historical issue.

Had a print out of the emissions test and I took it on myself to compare it to the print out from last year.  My thinking was to see if cleaning the air filter and sensor made any difference although I don't know how to quantify that difference and indeed the only real test would be to do the emission test before any cleaning took place. Secondly, I confess to not really understanding the emission test procedure beyond the basics .i.e. The smoke test for unburnt fuel in the exhaust. 
  
Comparing the two printouts seems to show that Hx is running cleaner then last year!  I need to study the meaning of the emission test closer.

MOT Smoke Test  2016
Smoke reading  'peak1'  =  0.76 m-1
Zero drift    =    0.01 m-1
Average      =    0.75 m-1
Test Result   0.75m-1   PASS  ( Max.1.50)

Another more alarming statistic is the recorded mileage.  95961 this year and last year was 94933 which means  Hx only ran 1028 miles in 12mths.

Every time it passes I hope for some sort of 'boost' and to find encouragement to do more work on Hx just to get it to that place before ownership ends......