Switching over to electric leather seats has been a long on-going process, but by breaking it down into sections it is easily accomplished. Physically removing each seat should take no more then 20 minutes. It's a bit surprising how easy they detach and by far the hardest part is physically moving the awkward 'dead' weights out of the body-shell...
Front Seat Removal.


(1) - Start by fully disconnecting and isolating the battery. (see '5'). Ensure that the seat back is fully upright and not reclined at all. This position will help greatly when moving the seat out of the door aperture.
(3) - Remove the lower seat frame plastic trim plate. This will allow easy access to the mounting bolts.
(4) - Shift the seat fully backwards on its rails to allow easier access to the two front mounting bolts and remove them fully. Then shift the seat fully forward to gain easy access to the two rear mounting bolts and remove them.
The torque wrench setting is 45Nm and they should all free up easily. Three of the bolts are 40mm long and are secured into the body-shell floor-pan. The fourth bolt is slightly longer at 45mm and is secured through the floor-pan by an external 17mm nut and washer accessible from below. A good clean and a squirt of WD or penetrating oil on the nut will help shift the inevitable crud build-up and it should free up easily. The Torx bolt-head can be locked against the seat frame once the nut begins to turn the bolt.
(5) - With the seat base now free, it should be easy to rock the whole seat backwards to rest upon the rear seat structure. This will allow access to the underneath of the seat frame in order to release any wiring loom connectors that are attached to the seat.
Every D2 Discovery will have a brown female 5-pin connector that is part of the fitted vehicle loom whether it is used or not. Every D2 will also have a yellow twin wire connector under each seat. This is the connection for the seat-belt pre-tensioner and it MUST be treated with respect.
 |
| Seat-Belt Pre-tensioner connection under each front seat. |
The seat-belt pre-tensioners are often overlooked in importance and ability to trip the SRS Airbag deployment. The SRS system constantly monitors the wiring and resistance value by pulsing small electrical signals through the wiring. Any sudden spike caused by 'live' disconnection or connection could easily fire the explosive charges and deploy the airbags. Quite a shock indeed!
Isolating the battery before removing the yellow connector is therefore essential. Rave's advice even then is to wait ten minutes after battery isolation before removing the connector.
I watched a few online videos about seat-belt pre-tensioners and the precautions needed in their handling and quickly decided to take no chances!
(6) - With the seat fully disconnected, it can be removed from the door aperture. The seats do not weigh that much but it is difficult to get a good balanced grip on them. An assistant at this stage would be handy. There is also the option of removal through the back door IF the rear seats have already been removed!
(7) - Refitting is the reversal of the above. Should the SRS warning lamp light up on the dash, you will know where to go looking, just remember to isolate the battery beforehand!
Seat Frame Mounting Points.
Once the lower seat frame plastic trim plates are removed the frame fixings are easily accessible.


Lh/Rh Seat frame front outer mountings. The fitted carpet has the cut-out sections already in place..


..Here are the front inner mountings, again with the pre-cut carpet..

This is the rear outer mounting. The bolt passes through the floor-pan and is secured below by a 17mm nut. This is the most awkward fixing to undo.
Under Seat Loom Connectors.
Every D2 Discovery will have a bright yellow Seat-Belt Pre-Tensioner connector as well as a 5-pin female brown connector fitted as standard.
Whether the brown connector is actually attached or not depends on the individual vehicle trim level. Other connectors may be present again dependent on trim levels. For example, the audio power amplifier and multi-CD changer were installed under the seats and if the seats are electric there will be even more connectors and looms present..
Rave has an extensive electrical library that can be used to identify the functions of these loom connections.
In the case of HX, the brown connector is unused, but it will soon come into play when the electric seats are installed. I wrote a lot more about this brown 5-pin connector and its matching 'plug' in other blogs. See 'Hx52 - Electric Leather.
 |
| The original un-used brown connector under each front seat on Hx. |
The pressed steel panels that form the seat base are spot welded together and coated with black paint.
One of the front seat mountings that was to be installed showed some corrosion around a rear mounting point. The paintwork could be seen to be bubbling and it easily scraped away to reveal a nasty patch of corrosion...

This is the extent of the corrosion on the rear outer mounting of the RH front seat. This mounting is the one that is secured from below the floor-pan. I am at a loss to explain why this is so corroded. The seat frames removed from Hx were free of corrosion in the same area so I can only assume something has happened to the donor car down there in the past. My first thought was towards flooding!
After I had scraped and sanded away the surface corrosion, I treated the area with some 'Hammerite Kurust' corrosion converter.
Once applied, it quickly begins to chemically convert any corroded metal to a more stable condition and effectively halts the corrosion process. To be fully effective it must be over coated with a protective topcoat otherwise given time the corrosion will return.
Kurust has the colour and texture of milk when first applied. It then quickly turns the treated surface to a vibrant blue colour before drying with a black sheen. There is hardly any vapor given off during the process..
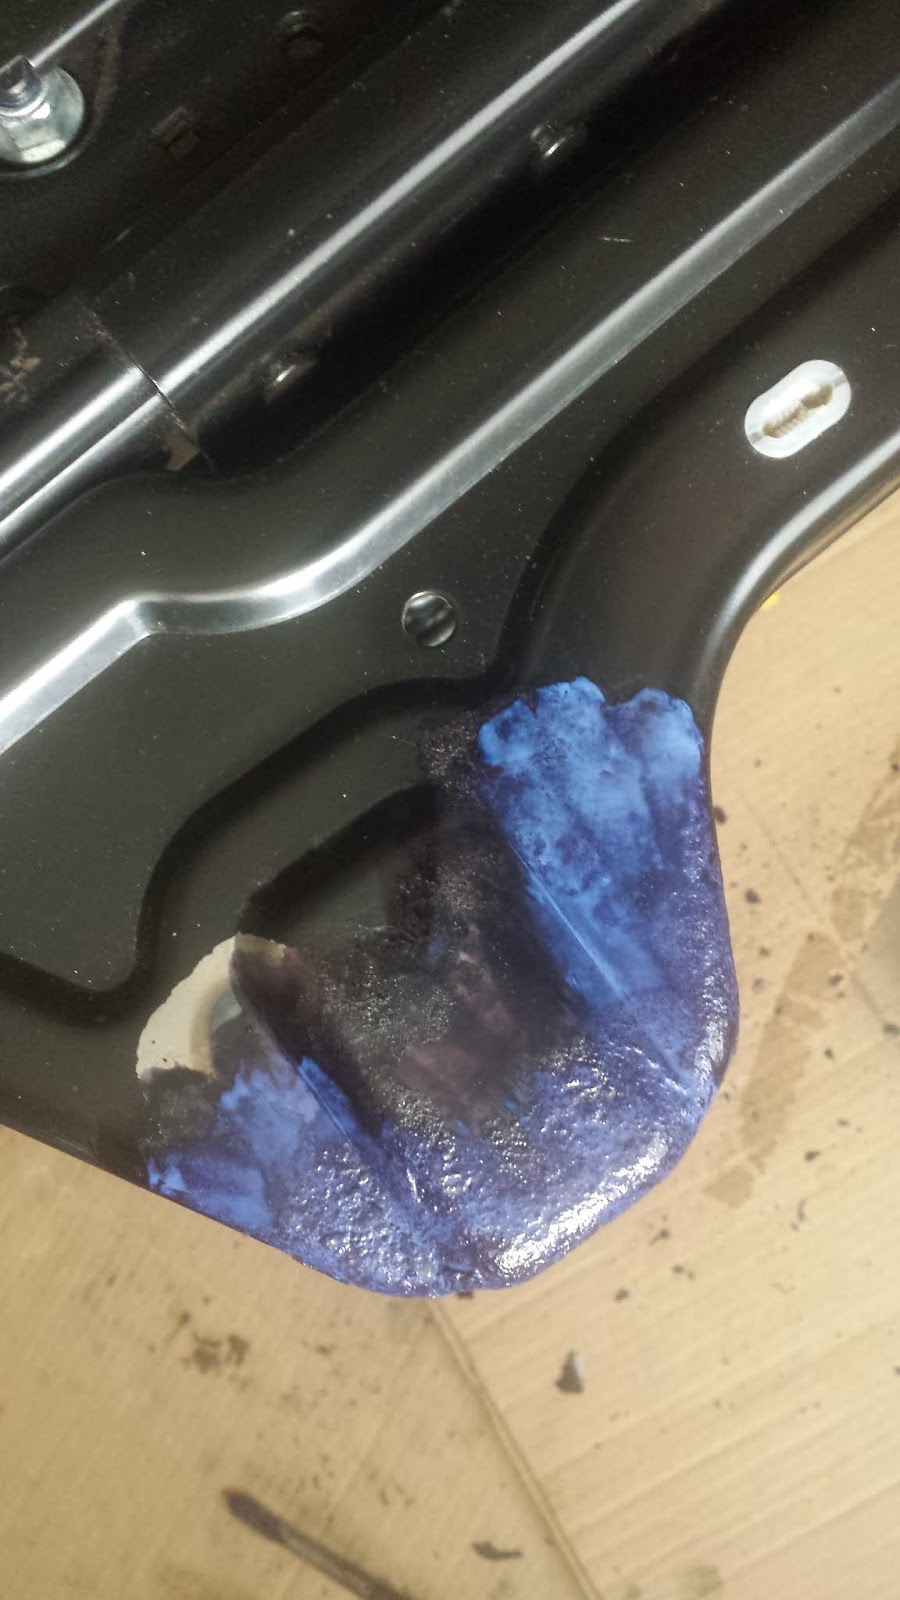

The two photos above show the results of using the Kurust on the seat frame corrosion. The blue tone is the reaction underway and it quickly dries to a black sheen like finish. After three hours it is safe to overcoat as recommended.
Rear Seat Removal.

 |
| Front (2) and Rear (4) views of the locating bolts for the rear seats. |
The Rear passenger seats have a 60/40 split arrangement and each segment is secured to the floor-pan by four Torx star-bolts. For some reason, they are not the same as the bolts that secure the front seats. A T50 drive bit is required to remove them.

Remove the front bolts first by simply folding the carpet back to reveal the sprung hinge fixings. With the seat then folded fully forward, similar access can be had to the rear fixing points.
The central Seat-Belt mounting and anchor points are integral to the rear seat structure and there are no electrical looms to deal with. The back and base panels can be removed to gain access to the seat-belt and central armrest mechanism.
Removal of the rear seats is quick and easy, but it should be noted that the larger section is quite heavy and can be awkward to move out of the body shell.
Third Row 'Dickie' Seats.
Hx was a seven seat D2, but a few years ago the 3rd row seats were removed with the intention of fitting the much more practical storage bins in their place.
With the recent purchase of the leather interior, I now find myself with a spare set of Dickie seats to play around with. They won't be going back on though.
No comments:
Post a Comment
Note: only a member of this blog may post a comment.