27-06-16. Suffered a failure of the front passenger door window regulator. Rather embarrassing and quite bizarrely it happened while the former owner of Hx was in the passenger seat and being driven around by myself.
While opening or closing the window, the mechanism just let out a loud crack and then it sounded like a broken cog missing some teeth. I knew straight away it was terminal and was just grateful the window made it back to the closed position.
While opening or closing the window, the mechanism just let out a loud crack and then it sounded like a broken cog missing some teeth. I knew straight away it was terminal and was just grateful the window made it back to the closed position.
Research on the Web and in Rave soon got me up to speed. I found out it is a common problem and the replacement mechanism is readily available for under £20. I went to the local LR indy garage and purchased one the next day. I was a bit dismayed though to find out it is a 'Britpart'.
Removal of the broken mechanism from inside the door was straight forward. I followed the simple directions in Rave and had no problem at all. Rather then tape the window pane closed as per Rave, I choose to prop up the window pane using a suitable wooden block placed inside the door cavity.

When removed and compared to the replacement 'Britpart' the only difference observed was in the design of the roller bearings inside the arms. These parts are known weak points and are what usually fails.
Basically the new Britpart has nylon wheels while the fitted part had oblong 'slider' components. The above photo tries to show these differences.
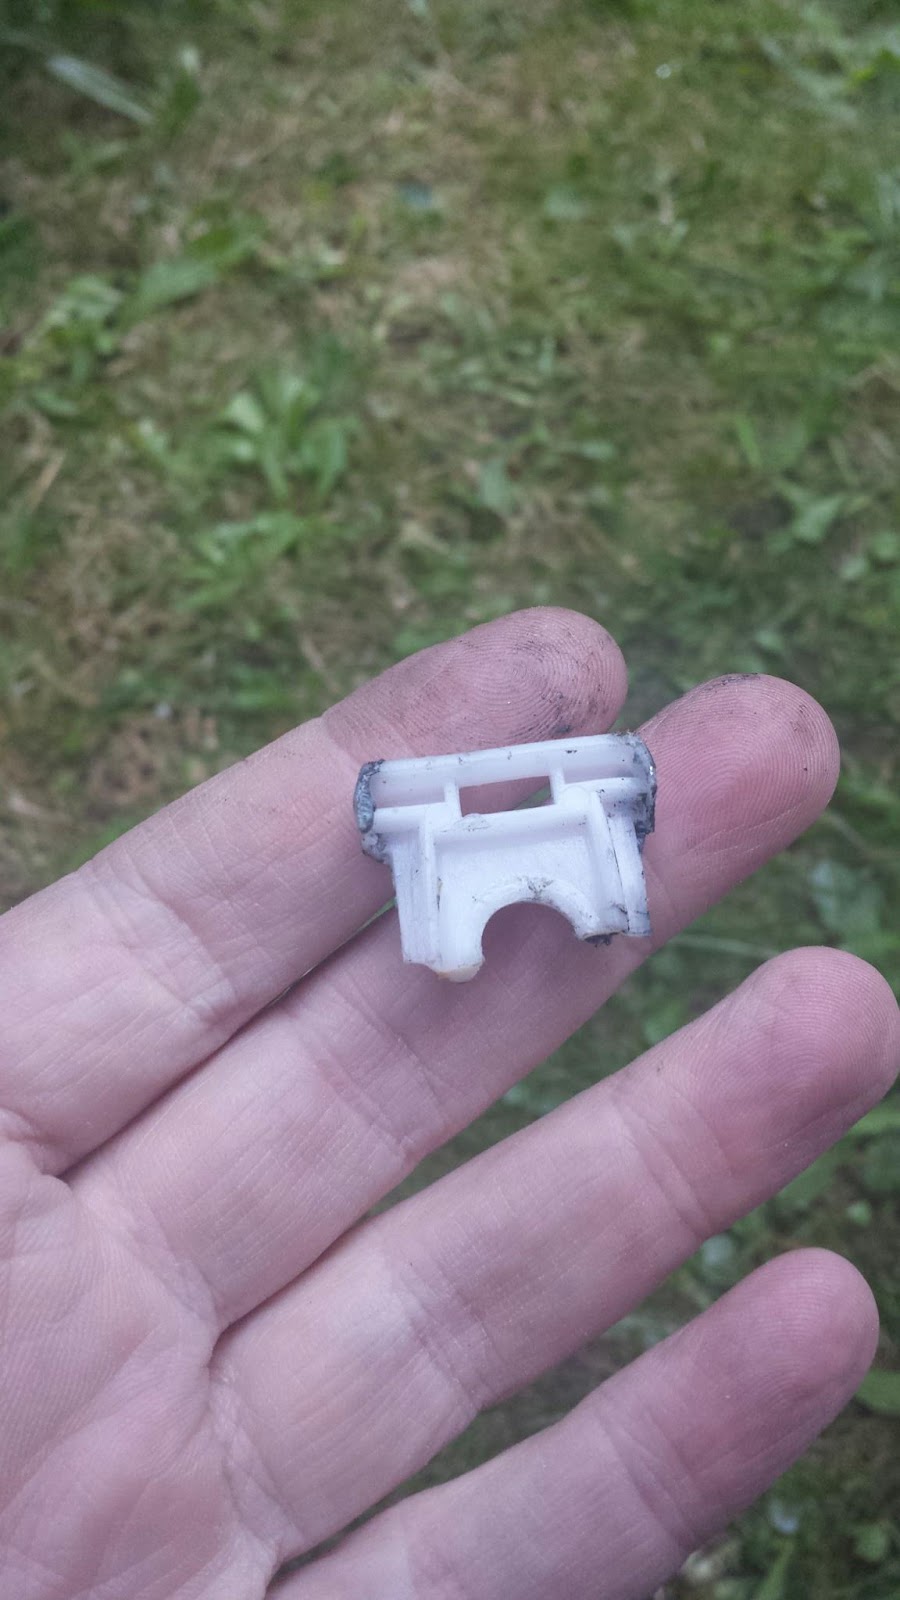
True to form, this is the remains of the broken nylon slider that caused the regulator to malfunction. Its just another exhibit for the little shop of horrors..


Two views of the broken regulator (minus the motor) removed from Hx. The upper horizontal channel attaches to the window glass and the 'scissor' action is what propels the window up or down via the large semicircular cog wheel at the bottom left.
The ends of the two arms are free to move along that channel via nylon rollers or in this case, rectangular sliders.
The forces exerted on these joints over time can be enough to cause them to fail. In this case the slider in the top right position has failed and broke in two.

.. a close up of the failed slider.

This view shows the end of the arm bent out of alignment by the force of the motor. That plastic slider was held captive around the spigot on the end of the arm.

Any of these joints can break as the image above from the Web shows. The lower, smaller horizontal channel is bolted to the door body and acts as the fulcrum in the lever mechanism. In the above photo, the arm that attaches to it can be seen to be badly twisted out of shape.
Repairs to the mechanism are possible. The twisted arms can be re-aligned and the broken rollers replaced with suitable alternatives (nylon sliding door wheels or even just washers) although the 'spigot' may itself need to be drilled out and replaced. It should be noted that each regulator is 'sided' and cannot be installed into any other door other then the one its designed for.
There is another fail point on the mechanism that can be fatal..

It is the riveted attachment of the 'cogwheel' to the central arm. If these fail and no other damage was done then they can also be repaired.

This is the same area on the removed regulator. Around this time I started to think that the 'broken' regulator did not look all that old. The photo at the top of this blog shows both regulators together and without knowing which is which, it's hard to tell them apart.

The original window motor needs to be swapped over to the new regulator. It is held in place by 3 torx bolts and once removed the mechanism is free to move around and I worried about aligning the new regulator in the same position when installing the motor on it.
The answer was simple. The above photo was taken before dismantling and the number of teeth visible from the bottom of the cogwheel up to the drive 'cage' was counted.. 7 in all. It was easy to ensure the new regulator replicated this.
As mentioned earlier, the apparent age of the motor looked older then the broken regulator.
This lent more thought to the idea that the regulator I was replacing was not the original factory-fitted item. Here is another clue that I overlooked...

When I removed the door panel, the vapor barrier looked like this. It is obvious that someone had been here before me. When I removed all the black tape and folded the barrier back on itself, all the mounting bolts for the regulator were easily accessible.
hmm..... After a verbal and paper search it was confirmed that both of the front door regulators on Hx had been replaced before my ownership began. I have receipts for work done in Dec 2008 to replace the nearside front regulator for £136.39 and then in Nov 2011 for the offside front regulator for £105. Both jobs were done under warranty which may explain the hefty labour charges.
All very well, but I then found myself wondering why the mechanism should fail like it does..
Read somewhere that component failure in any manufactured item is down to one of three things. Design, Build quality or Operator abuse!
DESIGN - It turns out that the design of the window regulators is a carry over from the original Disco 1. This may well explain the relatively cheap and easy availability of new replacements, but points to a reluctance to improve the design. Afterall, the original design lasted the full 15 year production run.
The principal design and layout of a window regulator is the same across all vehicles whether manual or electric. The small but powerful motors used in electric window regulators do introduce other design considerations.
The motors are well capable of lifting or 'driving' the window up or down till it comes to its bump stops - either fully open or fully closed. However the simple controls on the motor allow it to continue to 'drive' the window mechanism into an overload situation for a second or two till the overload cut-off kicks in and the power is cut. It's the same for the inbuilt safety feature if something gets trapped by the closing window. After a second or two of 'overload' the motor cuts out..
This brief overload situation places great strain on the joints of the mechanism right where the nylon roller/ sliders are. Over time, all this flexing and stressing probably leads to fatigue cracks and failures. So what can be done to prevent this overload situation..?
Well, certain 'upmarket' manufacturers build micro switches into their designs which control the power to the motor as the regulator arms get to their travel limits. I guess it's a question of cost analysis versus longevity. I like to think that someone in LR worked out the maximum cycles of operation the designed mechanism can safely operate and thought. .. 'that'll do'...
BUILD QUALITY - 'OEM' is often taken to mean 'factory fitted' and the assumption is that the part would pass any quality control measures the vehicle manufacturer specified. It often means that replacement parts labelled 'OEM' are more expensive then other aftermarket or pattern parts. You pay your money and take your choice.... and end up with 'Britpart'.
OPERATOR ABUSE - Although I would say I am not a great user of the windows, I have to own up to some more regular abuse!!
Many times at the end of a journey, I will operate the window buttons just to check the windows are fully closed. This simple action is precisely what places the greatest strain on the parts of the mechanism that are most prone to failure!
And while I can't do anything about the motor driving the window auto-down onto its bump stops, I can stop manually driving the window up into its closed position by anticipating it's travel to reduce the amount of 'overload' placed on the mechanism.
No comments:
Post a Comment
Note: only a member of this blog may post a comment.